If you are subscribed to the Doteasy Unlimited or Doteasy SSD hosting plans, you are allowed to host additional domain names on your hosting account at no extra hosting costs.
The additional domains that you add on to your hosting account are called add-on domains and you can add them to your existing Unlimited Hosting account from your account cPanel.
Here are the 3 steps you need to follow:
- Register your add-on domain name(s)
- Point your add-on domain(s) to your Doteasy name servers
- Add the add-on domain(s) to your Unlimited Hosting account
Registering your add-on domain name(s)
The add-on domain name must already registered before you can add it to your Unlimited Hosting account.
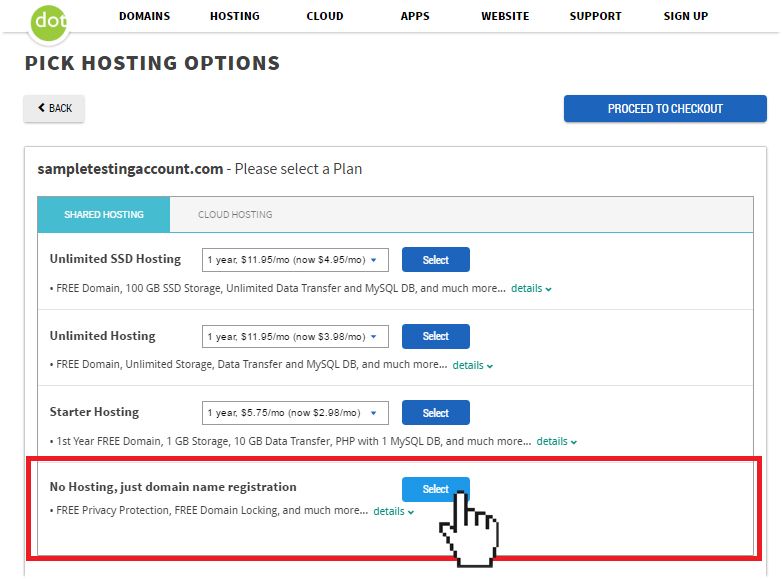
If you haven't registered the domain name yet, you can do so using our signup form. Simply select No Hosting, just domain name registration during the signup process.
Pointing the add-on domains to your Doteasy name servers
Once you have registered the add-on domain name, you will need to change its name servers so that the domain is pointing to your Unlimited Hosting account.
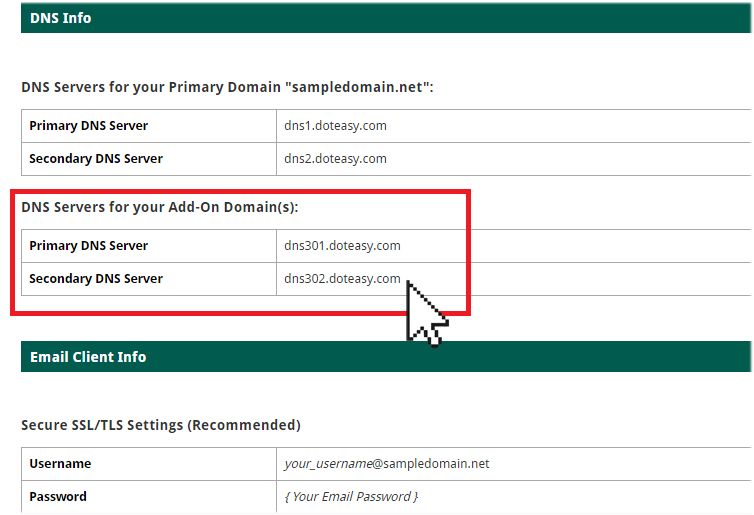
You can find the correct add-on domain name servers in your Member Zone.
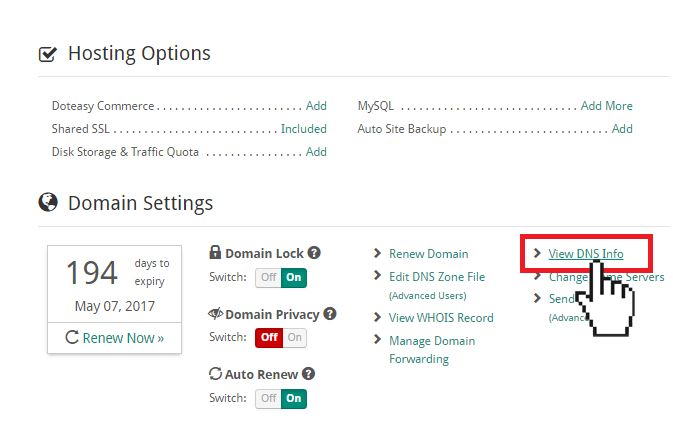
- Login to your Unlimited Hosting (or SSD Hosting) account's Member Zone and click on View DNS Info.
- Copy the add-on domain primary and secondary DNS servers information.
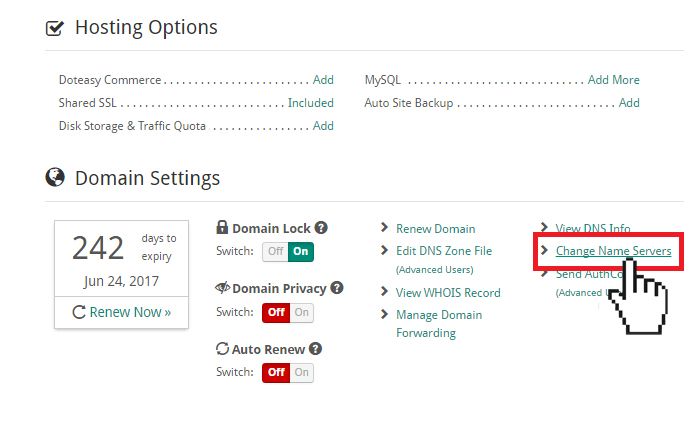
- Login to your add-on domain's Member Zone and click Change Name Servers.
- Paste the add-on primary and secondary DNS information into the New primary DNS server hostname and New secondary DNS server hostname fields.
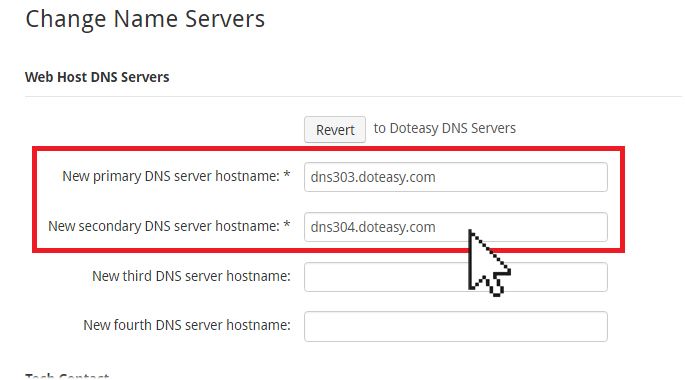
- When ready, click Apply Changes. DNS changes typically take 12-24 hours to completely propagate and take effect.
Adding the add-on domain to your Unlimited Hosting account
Once you have registered the add-on domain name and have made the necessary DNS changes (and the DNS changes have completely propagated), you can add it to your Unlimited Hosting account.
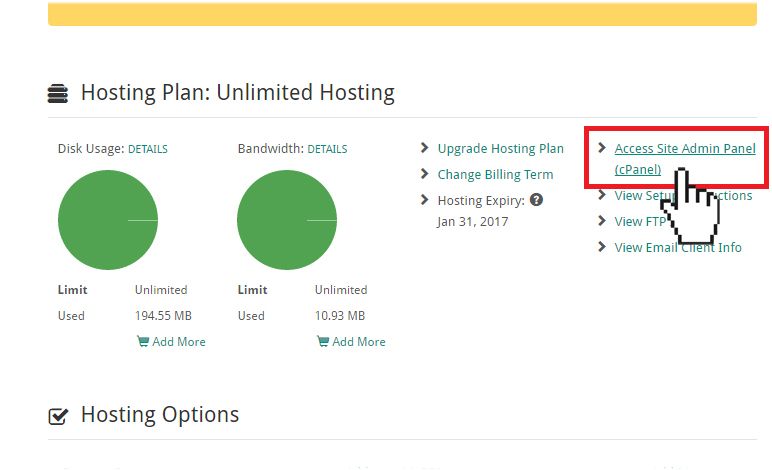
- Login to your Unlimited Hosting account's Member Zone and click Access Site Admin Panel (cPanel).
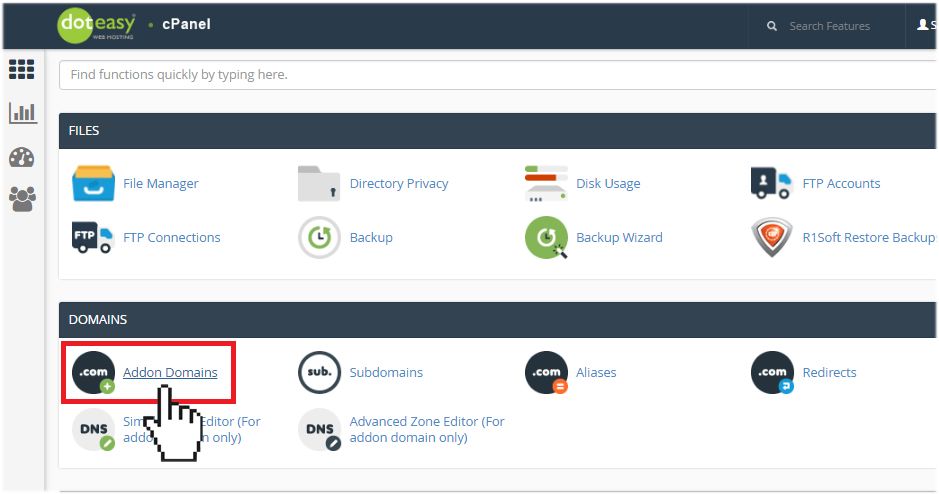
- On the cPanel screen, click Addon Domains under the Domain section.
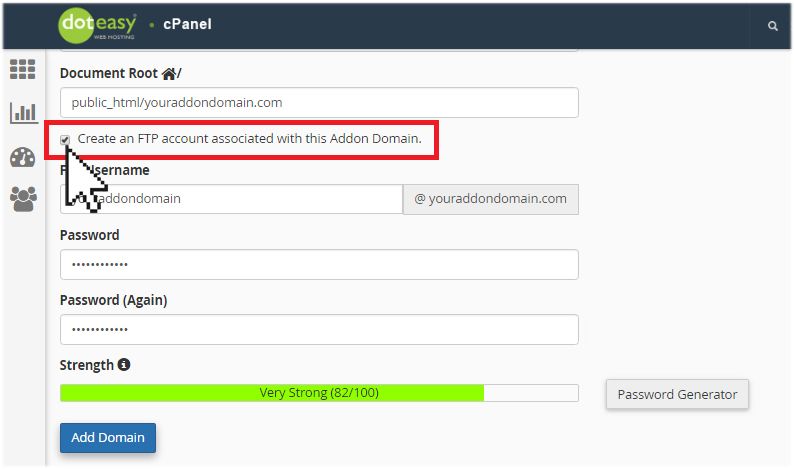
- Under Create an Addon Domain, enter the add-on domain name. You don't have to worry about the Subdomain or Document Root fields as they will be auto-generated for you.
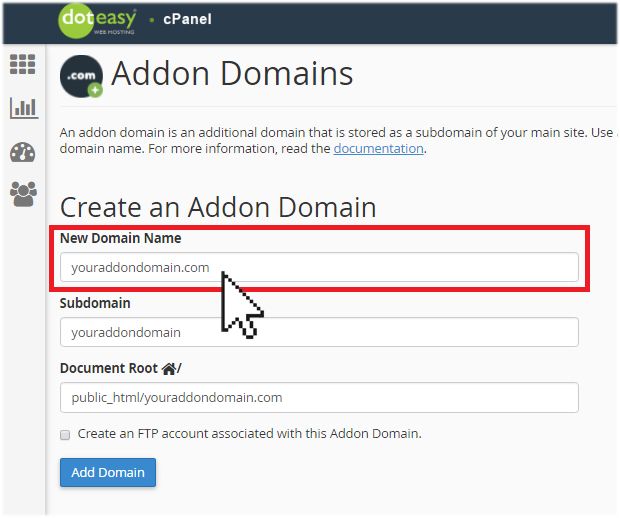
- If you want to create an FTP account for this addon domain, check the Create an FTP account associated with this Addon Domain option. Give the FTP account a password. When ready, click Add Domain.
And that's it! The add-on domain is now added on to your Unlimited Hosting account and you can now upload your web files or install WordPress and other apps on your add-on domain. You can also create domain email accounts using your add-on domain name.